Compared to the top, the skirt construction was much simpler. It was also a very satisfying sew with a large visual impact - I’m talking about the dramatic train! Before I get ahead of myself, let’s jump into the first mockup fitting.
Mock up from the paper pattern
I was very pleased with the first mockup because it fitted as intended. I even added extra seam allowance in case I need changes! But no changes needed - yay! I found the mockup really helpful as I wandered around the house, and up and down the stairs, to simulate walking with a dress train. At one point, I did think about shortening the train because I got really frustrated with myself stepping all over the dress train, but I really enjoyed the drama the train brought. And honestly, I will likely not find another occasion where I can wear a dress with a train.
 |
How perfect is this beautiful skirt mock up?!
|
Design changes: Skirt flare and horsehair braid hem
While I was deciding on the skirt design, a major conundrum was how I wanted the hem to look. I originally thought I wanted the skirt hem to stand out so I bought some horsehair brand to give the hem some oomph. Well, it turns out I gave it too much oomph with the heavy 3” horsehair braid, and likely should have went for the 1-2” soft horsehair braid. The amount of skirt volume I had plus the horsehair braid made walking elegantly difficult. The skirt fabric trailing behind me starts to fight with each other. Another potential option that I have not tested was ban-rol, which Ada @i.hope.sew suggested. Back to the hem. With all the oomph, the skirt was more ballgown like, which was not what I envisioned.
 |
The skirt is giving a lot of OOMPH
|
 |
Skirt back with too much oomph.
|
I briefly toyed with the idea of adding a skirt structure - a petticoat for the mermaid flare. To test this idea, I stuffed my skirt with a bunch of tulle I had on hand, as Mariko @marikeabecreative suggested. It was holding the skirt up a lot better, but definitely wasn’t what I envisioned where the skirt drapes down carefreely. There was still too much fabric. So I decided to reduce the volume of the flare and re-hem with horsehair braid. Again, the horsehair braid was giving too much life to the hem. In the end, I decided on no horsehair braid because it was not adding to the design and the hem was not falling in the way I like. The design change of reducing the volume helped me walk easier and made the skirt drape closer to what I envisioned.
 |
Testing how much volume to reduce
|
 |
Skirt volume reduced
|
Design Decision: Pockets?
Pockets, pockets, pockets! Who doesn’t love a good pocket? I’ve been adding giant pockets to my me made all this time, and definitely questioned if I wanted pockets for this skirt. The original thought was that if I were to wear this skirt separately on a different occasion, perhaps I could use a pocket or two. To experiment if adding pockets will disrupt the style lines, I sketched out the design on an existing photo of my mockup. I really love the idea of it. However, seeing as this skirt is a mermaid silhouette, and the overlay dress will render the pockets useless for a short while, I ultimately had to make the hard decision of foregoing pockets. I don’t regret it though because the top-skirt set looks AMAZING in my final photos!
 |
How do pockets look in this style line drawing?
|
Making the final skirt
I will admit it here: I will absolutely bend over backwards if I can achieve the most beautiful insides of a garment. I’m talking about all raw seams being encased, and just smooth pretty finishes. I thought for a long while how to finish the skirt seams with the linen and underlining, and debated if I wanted to add a lining. That was until I stumbled upon this
blogpost outlining how to make a faux Hong Kong seam finish to encase raw seams. The example was a pencil skirt with straight seams, but I was unsure if the technique would work on a pattern piece with large curvature. A small scale mock up of the skirt panel with flare confirmed it would work, so I proceeded with cutting and assembling all my pattern pieces. The invisible zipper went in smoothly as well.
 |
Faux HK finish
|
 |
Skirt try on before finishing touches
|
Finishing Touches
I have seen these grosgrain ribbons used in men’s trousers and couture books for waistband finishing, so I was eager to give this a try to elevate my skirt. I loved how easy and neat it was to apply the finish. I was quite surprised with how easily the grosgrain ribbon unravels though - if anyone has tips dealing with the ends, please let me know. However, with the smooth grosgrain ribbon finish, I actually find that my skirt slips down a tiny bit more. Perhaps the waist could be taken in some more? Adding a hook and eye definitely helped cinch in the waist a tiny bit more, but I personally liked the current amount of ease.
 |
The most beautiful finish inside a garment~
|
As for the hem, I waited until my overlay dress was finished before hemming. In the final weeks leading up to my self-imposed deadline, I threw caution to the wind and decided to buy pre-made extra wide bias tape so I can panic-sew the miles of skirt hem.
 |
Hand sewing the bias tape hem
|
What I would do differently
The skirt was pretty much smooth sailing. The only thing I would do differently is to add a mechanism to attach it securely to the top when wearing it as a set. For my photos, I used safety pins. However, I am considering hooks, snaps or magnetic closures as alternative options.
 |
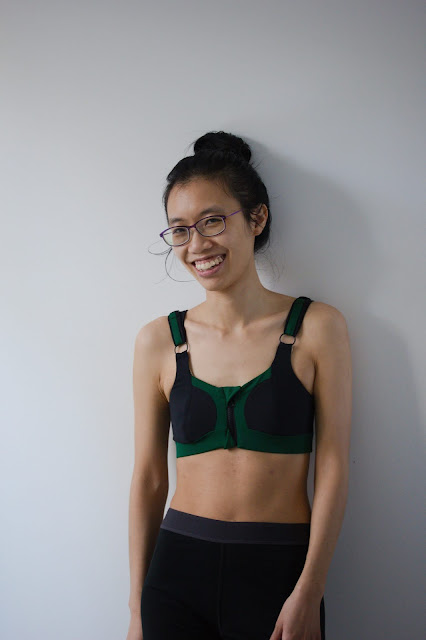
Top-skirt set is done!
|
Next up is all about the overlay dress. If you’ve made it this far, thanks for following along my wedding dress journey!


Comments
Post a Comment