Pattern Testing: Olive Jumpsuit
*Pattern Testing agreement does not include pattern promotion All opinions are my own*
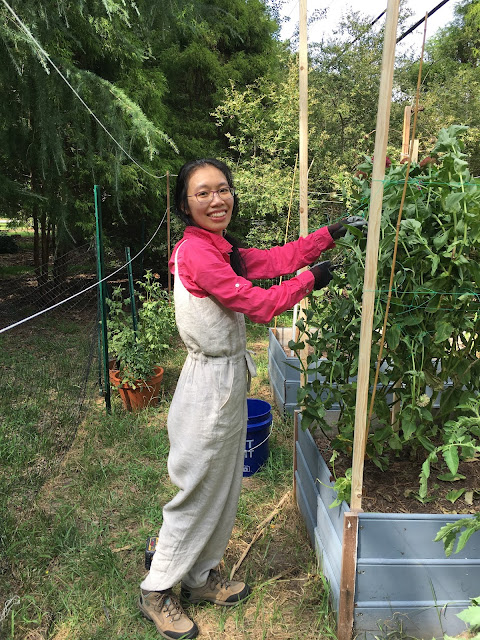 |
| Olive Jumpsuit in the wild! |
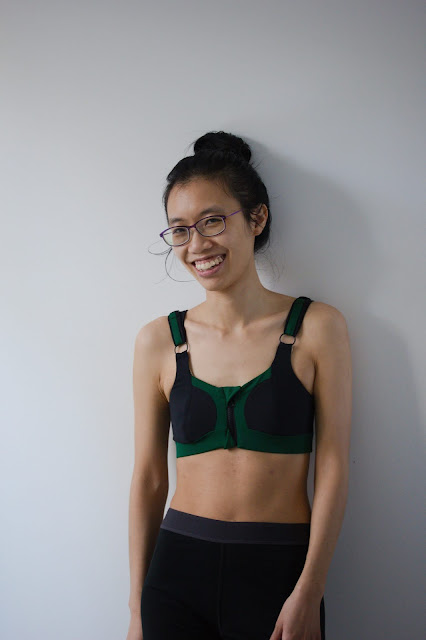
The bodice comes in 2 cup sizes, and has a low back and a bra-friendly back option. The pattern accommodates up to a 58" hips and is now expanded to three bottom views: tapered leg pants, wide leg pants and shorts. I chose the low back option and the tapered leg pants for this test.

Size, Fit, and Adjustment Details
I decided to first test the pattern in muslin before making a fabric selection. So I made Size A, B-cup with the low back bodice and tapered leg pants (shortened 4 inches at L/S line).
The bust, waist, hips landmarks are accurate to my body. And the balance lines look really good to me with the exception of the back. After fitting two other UT patterns, I known by now that the shoulders/back width are drafted wider than mine. So, pinching in 1” at CB to narrow my back width is no surprise for me. I also know I normally have to do a sway back adjustment of 1” across different designers, and it’s true that I have to do the same adjustment here. As for the pants, they hang nice and straight out of the envelope. The only thing was my sway back affected how the hip balance line look in the back. But it’s an easy fix by adding back some length to hip line after I slash and spread the needed length. (Note: depending on what camp you’re in, some people don’t agree with this edit… The alternate is to add additional length at the top of the crotch curve)
Overall, the fit is very comfortable with plenty of ease in the waist, hips, and thighs. The drawstring is there to cinch in the waist so fit there is very loose to accommodate pulling on and off the garment over your hips. I find I could really use a thin thigh adjustment, but for the purpose of gardening and maximizing movements, it's fine. Depending on which bodice view you choose, it might be a bit tricky to fit. But I do think this is a pattern for confident beginners to intermediate.
 |
Fabric Choices: Shrinkage, Wrinkles, and Finishes
After wearing the muslin around for a day, I decided this would actually be the perfect garden dungarees/overalls/jumpsuit. Because the summer heat and humidity here is no joke, and mosquitoes are always chasing after me, I needed something that will give me full coverage but is breezy enough to wear outside. I set my heart on a light color linen canvas from Fabrics-Store.com, and reused some old toiles for the lining and pocket pieces. Yay for scrap busting!
I purchased the 4C22 Mix Natural FS Premier Finish (7.1 oz/sq yd) from the "Doggie Bag" discount pile. I figured 2 yards is plenty, but threw in a 0.6 yards (same color but different finish) right before check out for luck to anticipate shrinkage post pre-wash. I definitely think the vendor website has accurate portrayal of the expected shrinkage (up to 10%), so calculate for your specific project accordingly.
This is my first time working with 100% linen, and I’m definitely weary about the wrinkles. Super wrinkly is not a look I desire. Sandra Betzina advises for less wrinkles by treating the linens fabric like this: press a hot iron on the fabric before laundering. Dry until it’s bone dry and remove from dryer. (Source: https://www.powersewing.com/blog/?post_id=49) The fabric came out much softer, and I really love the crumply texture. There is something so soothing about it... perhaps an ASMR for eyes? LOL
Another thing I want to touch on is the finishing on the fabric. Fabrics-store.com has a few different finishing, and I personally find they don't really mean much until you get yourself a sample, launder it and pet it for a while. I did buy a sample, but it was so tiny a square, I doubt I would get a good feel for the post-launder finish. The Doggie Bag area is a good way to test out the finish. I noted earlier that I bought 2 yards of Premier Finish, and 0.6 yards of another finish, which is the "Softened". The Softened finish is actually the only offering across their many variety of color choices, and now I know why. You can definitely tell the difference between the two. The Softened finish is definitely true to name -- soft, while the Premier Finish has that rougher fibery feel to it. So depending on what you are making and what finish you desire, choose accordingly!
 |
Cutting and Sewing
Cutting was really interesting because I wasn't anticipating the fabric to shift at all. There was minor shifting, but still, I was expecting it to be more like a quilting cotton type stability. Also, this fabric is so THICK! I had to whip out my seriously sharp tailoring scissors for this. Post-cutting, when I compare my cut bodice pieces and its lining in muslin, I noticed the linen pieces grew a tiny bit - so it's definitely shiftier than I expected. Over the sewing process, I noticed similar issues too. A tiny bit of fabric would shift out of place, but it could also be my presser foot pressure needing adjustments.
POCKETS x4!!
In addition to the patch pockets that came with the design, I decided I want all the pockets! So I draft another set of waist-anchored inseam pockets. My super large phone can still get in and out, but I would really make the pocket opening bigger next time as this one is just a tad tight. Otherwise, the jumpsuit came together quite easily! Until...
 |
Sewing Detour
Until I realize that I had cut the back "wrong". Why in quotes? Because this is technically not a real boo-boo, and could be more like a style choice. After making the sway back adjustment on the back bodice and back pant leg, I forgot to raise the CB so there is that deep V. Instead, I ended up cutting two back pieces and joining them at the pants CB. I made it work, but also went back to the pattern pieces to make sure I corrected that for future versions.
Another issue I had, and this one is a real boo-boo, is that I somehow forgot to check the waist seam on the bodice and the pants to ensure they are of equal length. UGH. So I had to ease the pants a bit to the bodice. Good thing the waist casing covers it and the waist tie feature hides this mistake.
Final Thoughts
 |
This was a really fun pattern to test, and I'm so happy to see projector files in this pattern update because I'm now mostly a projector for sewing user! The jumpsuit is super easy to fit with plenty of ease, and contains some advanced techniques for adventurous beginners and intermediate sewists alike to learn, such as using stay tape for necklines and sewing up linings. Brittani also has French instructions for this pattern and transitioned to a Pay-as-you-can for her patterns.
I'm not really a jumpsuit person because going to the bathroom is so annoying. But since we're all stuck at home these days, I don't mind it. The Olive actually has a ton of ease, and wears very comfortably as secret pjs while still looking chic with a cinched in waist. These linen pair are dreamed up to be my gardening companion, and I have plans to pair these with a loose-fitted linen buttondown. So look forward to another linen project... coming soon-ish (aka whenever I get around to it)!
This linen canvas jumpsuit is actually QUITE heavy. I might use a lighter weight fabric next time, but it's probably perfect for working outside. I have yet to give it a test drive because it's raining all of this week! Gahhh! But I'm loving this beigey natural color, I feel like a Japanese-style minimalist!
 |
Comments
Post a Comment