Fancy dress: Sicily/Jose Cowl Neck Maxi Slip Dress
*Fabric gifted by Minerva.com in exchange for a post on their website. All opinions are my own.*
As the pandemic continues, I find myself gravitating towards more dramatic runway-esque styles and glamourous eveningwear vibes. I'm afraid by the end of this pandemic, I'll have so many of these "sew frosting" items that are not practical for everyday wear, but perfect for nonexistent events that I don't get invites to attend. That said, let's talk about the fabric that kick started this make's journey!
 |
 |

Conceptualizing a Pattern to match the Fabric
The original plan was to make a long sleeve wrap dress. Then it was a two piece set that I could mix and match with existing wardrobe. But when the fabric arrived and I looked at the print, it was busier and much bolder than I initially thought. Back to square one...
With such a beautiful print to show off, I was off to search for a simple pattern with minimal style lines. I arrived at these two:
1. Paradise Pattern’s Hallon Dress that has taken over my feed this summer or
2. Designer Stitch’s Jose cowl neck slip dress, a similar pattern to Sewing Masin’s Sicily Slip dress
To be honest, I waffled between the two silhouettes quite a bit. If you followed me on Instagram Stories, you would know I had trouble deciding down to the last SECOND! I love the dramatic gathered low back on the Hallon and the elegant high neckline. But I also love the sexy cowl neck of the Jose/Sicily and the super simple silhouette to show off the fabric. I had a battle of dress mock-ups and draped both of these beautiful details on the dress form to get a visual. It really helps to see a mock up in person because I’m not the best at imagining how the final product would work.
After staring at the details of these two dresses for a little bit, I finally decided to make the slip dress. The print on the fabric felt really overwhelming when gathered up, and somehow I can't stop seeing "grandma's curtains". I still have plans to make the Hallon dress, but it will come in a different post, so stay tuned! Because I already made a Jose cami and knew it fitted me really well, I decided to skip the muslin and went straight for the fabric.
 |
| Hallon Dress drape |
 |
| Sicily/Jose dress drape |
Working with the Fabric
Oh boy. I wish I could tell you how easy it was to whip up this dress. But it was not. The floral crepe is beautifully floaty and drapey. And to make the cowl fall correctly, the pattern piece needed to be cut on the bias. I'm glad I had a large work table to spread out the fabric in one layer to cut on the bias. I then eyeballed where the crossgrain is so I can identify and line up the bias. Just fiddling with the fabric took me a really long time. The fabric has a bit of crinkled texture, which is beautiful! But I was also hoping to retain that feature, so I did not press the fabric prior to cutting. In hindsight, it would have been best if I had pressed it since the bias nature of it would force the texture to go away due to gravity pulling. Also, the bias really does stretch quite a bit, and I didn't like how stretchy it made the bias tape, so I opted to cut the tape on the straight grain because the shoulder straps really need to hold the weight of the dress.
The cutting portion wasn't too bad as long as I was being careful, and having multiple cutting mats to go underneath the fabric is really helpful. Currently, I have two 2x3 ft mat that covers a little over half my table. But, ideally, I would really like for the whole table to be covered. Nonetheless, I managed to get the pieces cut out. While cutting, I decided I wanted to extend the dress to floor length afterall, and added on an additional 4 inches haphazardly - whoops!
I put in extra seam allowances on the side seams, just in case, and instead of sewing a french seam to conceal the raw edges, I decided to serge it. Turns out I either need to roll hem it, or do a 4-thread overlock because this 3-thread overlock stitch is pulling and stretching and doing all sorts of weird things. Either the feeddogs were feeding too fast, or it's just how bias fabrics sews, my having trouble on the serger was not exactly a joyful moment, but I was not feeling defeated until I was on the sewing machine. The drapey AND bias nature of this piece really makes sewing this fabric a bit of a nightmare. UGH! The fabric still slipped after I broke out the walking foot, so I had to correct it manually at times.
 |
| I can assure you I was not nearly this happy when the fighting-with-fabric was going on. |
Fitting
Unfortunately for me, there was a bit of fitting to be done because this fabric was a lot more drapey and fluid than the fabric I used for the Jose cami top. Plus, I really should have pressed out those crinkles like I said before to make my life easier. I had to try it on several many times to get the dress to look right on me and drape over my body. I attempted to take in the dress while on the dressform, but it looked even weirder on me. I wondered if all the adjusting while on the bias and shody sewing was affecting the fit. In the end, I decided to seam rip everything and start over. Once I did that, everything fit much better. Want to know the detail? Read onto the Sewing Detours, otherwise, Skip to final thoughts! We're a choose your adventure type of blog here. ;)
 |
| Choose your own adventure! I did ;) |
Sewing Detour 1: How the heck do I sew this slippy fabric!?
The drapey and bias fabric was not bringing me joy, and I had to google some ideas on how to deal with the problems effectively. I finally stumbled upon Made to Sew's guide on how to sew with slippy fabrics:
https://madetosew.com/sewing-with-silk-slippy-fabrics/
Highly recommend giving it a read if you are planning on sewing with slippy fabric AND on the bias. Her recommendation of sewing between tissue papers worked great for me. My seam was super long and it was difficult to wrangle tissue papers and fabrics layers, but I ended up laying everything as flat as possible, then pin everything before going to the machine. If I had read the post EARLIER, I would have cut the pieces between tissue papers from the start and save myself some headache.
 |
| Sewing the tissue sandwich with a lot of pins! |
With the sewing issues worked out, the fit looks much better because the fabric can now drape like it should. Because I went through all the trouble of basically redoing the whole garment, I might as well try this new idea of mine - making this garment "adjustment".
Sewing Detour Part 2: Steps to Make an "Adjustable" Garment
- Finish the neckline cowl as instructed
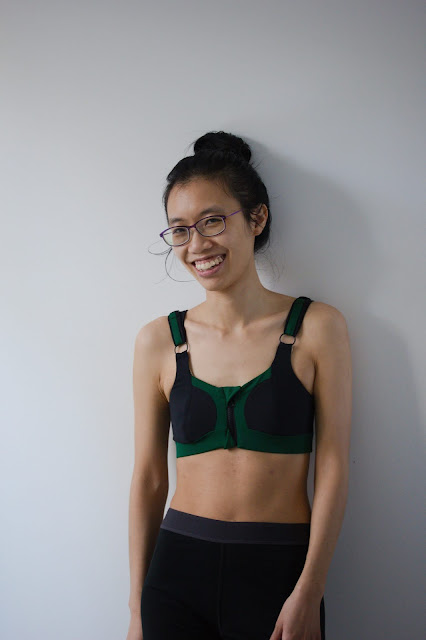
- Attach bra strap ring holder as instructed
- Finish the armholes and back with bias binding, taking care to fold under the bias tape at both ends. I used the method where you fold the bias tape inside such that it is invisible to the outer garment. and opted to finish the bias tape by hand sewing the edge down and picking up a a couple threads at a time.
- Finish side seams: I had serged the side seams earlier on, but now is the time to serge if you don't want to fold under the bias tape on the side seams like I did.
- Sew the side seams in the tissue paper sandwich. Btw, you can sew ahead several lines so all you have to do is unpick... Guess what? I should have done that, but I didn't - whoops!
- Sew on adjustable bra strap as instructed: See Bra strap finishing section for more details
- Let hang for 24 hours
- Finish hem
 |
| Handsewing finishes - isn't it delicious? |
 |
| Thank goodness I have a somewhat pinnable top, makes pressing this fiddly bit easier. |
Bra Strap Finishing
 |
| Back of the dress |
 |
| Back view close up |
All that's left is to Hem!


Final Thoughts
This fabric is absolutely gorgeous - the drape and fluidity is beautiful. But, I would not recommend sewing a bias project with it unless you're mentally prepared for it. Instead, it would make a really beautiful, drapey top or skirt as is, without the bias. That said, the Made to Sew resource is really helpful if you want to attempt bias. Give it a read if you'd like before starting your project, it might save you a lot of headaches!
I'm so pleased with the dress and can't wait to have an occasion to wear it! I'm debating about using left over scraps and adding godets at the bottom to make it into a more mermaid silhouette. But for now, I should think about hemming the dress.
 |
 |
Comments
Post a Comment