Pattern Testing: Audie Playdress
*Disclaimer: Pattern promotion not required as part of testing agreement.
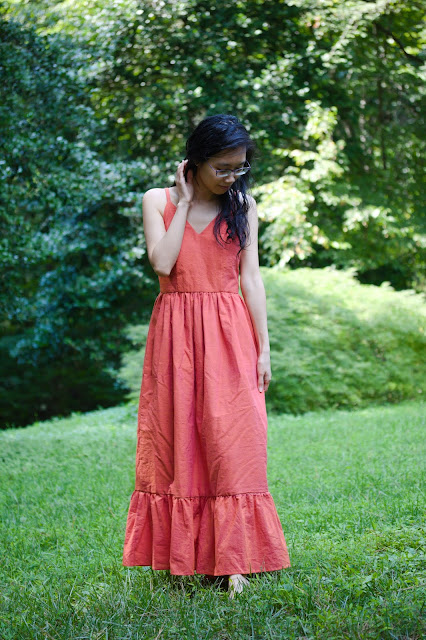
I had the opportunity to test the Audie Playdress from Amy Nicole Studio! If you’re familiar with Amy’s patterns, you may know that she has a Audie Playsuit Pattern already! This Playdress pattern is the sister version (also available in expansion pack option) with the same princess seam bodice. There are three skirt options: gathered, flared and pencil skirt. It comes with two bust cups sizes and accommodates up to a 61” Hips. Depending on the view you make, it could accommodate slightly bigger hips.
 |
| Oh, is that a squirrel over there? |
Fabric Choice, Cutting and Sewing
I had some more of the super lightweight cotton from India. This time it’s a beautiful fabric where the warp and welt threads are different colors (orange and pink). The weaved fabric is this beautiful coral color and depending on how the light hits it, there’s almost an iridescent effect - it’s lovely. I only wish it isn’t so sheer. So of course I end up making the bodice and main skirt with two layers of the main fabric. I was able to easily make use of the 4 yards I had. You really don’t need as much if your fabric isn’t as sheer as mine. And probably less if your bodice, lining and skirt are of different materials/fabric. The possibility of mixing and matching different fabrics for different occasions are endless!
With the two layers of fabric, I had to baste the two piece together at each edge before sewing like I normally would. I was also quite concerned that my bodice pieces won't be opaque enough, so I ended up taking apart the muslin and treating these as an underlining. In other words, my bodice actually contains three layers of fabric.
 |
| What a beautiful dress |
Size, Fit and Adjustment Details
I was waffling between the View A gathered skirt and View B sleek, flared skirt. But I finally came up with a cute design…
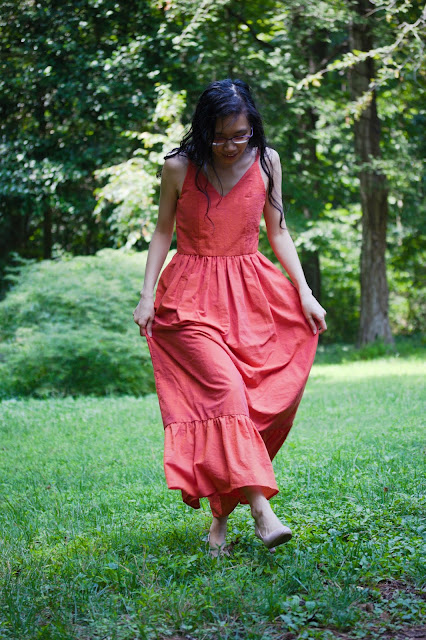
I decided on a Size 2 View A. Based on my design, I extended the skirt by 5” so it hits me past the knees, and added a long ruffle piece to the hem so the skirt hits the floor. I am quite proud that I optimized my fabric cuts such that I don’t waste too much fabric. After all, the gathered skirt and ruffles are just rectangles.
 |
During testing, we (testers and Amy) all agreed that the bodice has some extra ease. This was due to the playsuit design requiring the ease for movement. So if you want a fitted bodice, consider sizing down. I end up taking in some excess at the front princess seams.
After I attach the skirt piece and wear my dress for a little while, I believe I could benefit from a 1/2”-1” sway back adjustment. This is a normal adjustment for my body, I just always seem to forget about fitting the backside, lol!
 |
| Back looks good, but feels like the back skirt is pulling the bodice down |
One other thing I would advocate for is to redraft the inseam pockets into a waist-anchoring pockets. I ALWAYS do it when the pattern doesn’t come with one. With heavy phones and everything we want to fit in our pockets, weight bearing construction is essential (look at me being an engineer and all lol). In the Folds Pattern has a blog post on how to draft in-seam pockets and how to elevate them into weight bearing pockets: https://inthefolds.com/blog/2015/11/26/throwback-thursday-how-to-draft-in-seam-pockets
 |
| Back of the dress |
Final Thoughts
Amy’s instructions are amazing! I love the production line sewing style, minimizing the amount of time you need to run to the iron or serger. It was really odd for me at first because I automatically do that kind of optimization in my own head. I’m not great at reading every single word of the instructions, so I usually skim through the directions, which outlines the general construction steps, and then I’ll optimize how to get all these steps done in my head. This was like reverse-engineering what my head does!
I’m a HUGE fan of her instructions on sewing without pins and techniques for sewing curves and invisible zips. I wholeheartedly agree that pins are not needed as much as we’re led on to believe when we were beginners. I highly recommend her videos demonstrating these techniques. Dare I say, they’re life changing for me when I tried them.
 |
Something I would do differently next time I make this pattern is to create an adjustable strap. I believe it will make sewing the lining to the bodice without the strap pulling on each end.
This is now my favorite dress! It’s the swishy-ist maxi dress. And I have honestly not felt this beautiful in a long time. After a year plus of living in lockdown pjs, it was wonderful to have a fancy dress like this that is comfy AND beautiful.
 |
| Shown Seated |
Sewing Detours aka dumb things I did
I thought it was SOOOO smart of me to use my muslin, marked up with Crayola washable markers, as an underlining. But I soon realized it was stupid when I accidentally wet it and the ink ran a bit. I mean, it did disappear, but removing the ink completely will take a bit of laundering and perhaps some Oxiclean. All this to say, if you’re reusing your muslin, make sure your markings doesn’t bleed on your final fabric!
 |
| Whee, swishy dress |
 |


Comments
Post a Comment