Pattern Testing: Chalk and Notch's Farrah
I was very lucky to have the opportunity to pattern test for Chalk and Notch's updated Farrah blouse. It now goes up to size 30 with two cup options - yay! The pattern testing experience was very fast (6-7 days turn around), but also organized! I don't think I've participated in a test with the intention of two testing phases. It was a very different experience that I was glad to have been a part of. I enjoy pattern testing as a means to meet and interact with other sewists.
The Farrah is a beautiful blouse with generous ease. Well, it's really more of a tunic than blouse with the length hitting so close to the hips but I digress. I'm particularly enamored by the ruffled sleeved version, which also happened to be the one I tested! If you are interested in the pattern, there is currently a release sale until May 21, 2021 at Chalk and Notch. :)
*disclaimer: I'm not required to write a post or advertise for the pattern as a pattern tester*
 |
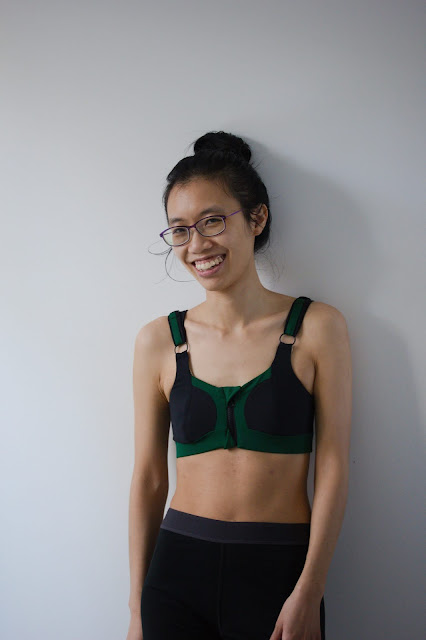
| Very pleased with the blouse |
Size, Fitting, and Adjustments
I fall into a size 2 A/B cup, so I made a size 2 toile (no adjustment), which fits really well! I was honestly really surprised at the fit above the bust. The shoulder sits exactly at my bone joints with the arm! The neck area lays flat against my body. But the bust apex was quite a bit lower. According to the designer, Gabriela mentioned the apex is arbitrary as long as I have ~4.5" of ease. Which I did, so I think it was fine in the end. The top also is supposed to end at the fullest part of the hips, which in my opinion is more like a tunic than a blouse.
 |
| Size 2 toile, back |
 |
| Size 2 toile, front. The pattern bust apex is marked on the toile, and mine is marked with pins |
For my final version, I used double gauze. And with its loose weave nature, I decided to size down to a 0. I also shortened the length because I prefer the length to hit at the high hips. I had to hack it to get the mitered corner in though. First I shortened by 3.5”, then I lined up the side seams of the top portion with the mitered corner, taking out any excess at center front and center back. That’s it! Not a whole lot to adjust here.
 |
| Pattern Adjustment for shortening the bodice |
Cutting and Sewing
I used 2 yards of Kokka Double Gauze I picked up at Harts Fabric a few years ago. The raindrops are super cute! I had enough fabric to squeeze out the ruffles lining in the same fabric, too - whoohoo! I get so excited for super clean finishing. As I was cutting this directional print, I noticed the ruffle pattern pieces don't tell you which direction is best, so you have to figure it out. At the very least, get your front ruffles such that it looks directional. Unfortunately for me, my back ruffles were upside down, so I had anti-gravity raindrops. It worked out that I was able to tell easily which side is which while I was sewing, but I really would have loved for the back ruffles to have raindrops that falls WITH gravity... just saying. Double gauze does fray easily, so I would not snip the notches and mark with a pen/chalk instead.
Unlucky for me, I am the type of person to skip around in the instructions. So, I accidentally sewn the gussets first, then the ruffles, resulting in ruffles on the inside of the garment, not outside. Unpicking is not fun, especially when my thread matches so perfectly and double gauze just frays with a lot of handling. So, after I resewn everything, I decided against a bias finish and opted for a serged finish because of the frayed gauze and thick layers (two yokes + gusset + ruffles seams x2 = 5 layers).
To save myself from more sewing detours, I decided to break up the gusset-to-bodice seam. This seam was particularly challenging in that precision is key. The instructions have you sew the V-shaped gusset in one go, but there were too many layers to wrangle and I could totally see myself sewing over something I shouldn't. Let this be a reminder that it's okay to break up the challenging seams into smaller chunks! :)
Final Thoughts
 |
| Side view of blouse. Aren't the ruffles nice? If you squint, you can see the bodice is lighter in color due to the layer count. |
I’m super thrilled with this make and can’t wait to integrate it into my wardrobe! The fit of a size 0 actually feels perfect for me, and there is still plenty of ease in my opinion to feel comfortable. This pattern is definitely an intermediate make with all the clean finishing inside and the tricky bits of sewing the yoke facings, gussets, and mitered hem finish.
If you're still choosing a fabric for the Farrah, here are some things I wish I knew before I started:
- If you have a directional print, be aware of how you orient the ruffle grainline to give you the desired print direction.
- If lining the ruffles, test the drape with a sample of the main and lining fabric sewn together. I find the squishy double gauze to have quite a bit of structure actually, so the ruffles became STATEMENT sleeves.
- If your fabric is sheer like mine, you may want to think about how the final garment would look (single vs. double layers). My gauze is light in color and weave, so it’s more transparent in the bodice pieces (single layer) but solid color everywhere else (double layers because of the addition of yoke facings and ruffles lining). It looks fine with a cami underneath, but I may adjust it later by adding a muslin lining so there isn't a disconnect in color.
That's it from me, I hope you find this post helpful! Leave me a comment if you have any questions or reach out on IG DMs. :)
 |
| Back of blouse |
Comments
Post a Comment