Wedding Sewing 2: Research and Design
I began my wedding dress research shortly after we decided to sign papers and therefore sew a dress. The research for design inspirations was a combination of internet browsing, trying on dresses, and in-person fabric shopping.
Researching Design Inspirations
At this point in time, I had no real ideas of what design I wanted. I was just letting myself go down various rabbit holes and find what I like. I did a combination of internet searches and seeing real dresses/fabrics on me prior to finalizing my decisions. I also changed my mind several times, but that's the nature of life. I'm not one to make a decision right away and tend to let things simmer in my head for a while before making a firm decision. Again, this whole journey is not linear at all.
Internet browsing/Pinterest
I've looked all over Pinterest for beautiful dresses, trying to pinpoint what I like and dislike: from style lines to silhouettes, lace vs. no lace, what color dress do I even like? I find myself gravitating towards sleeve less halter necks, mermaid, and A-line silhouettes with pretty and intricate back details. I love the floatiness and ethereal look as well. But that was all I could deduce from pictures, so it was time to visit a bridal salon and figure out what actually looks good ON me and what I preferred. Quite honestly, I also really needed to examine a real dress up close to get an idea of bridal gown construction.


Bridal Salon Visit
Based on my sewing experience, I knew I wanted a natural waist, floor-length dress with perhaps a baby train. Knowing my dress preferences from internet browsing, I walked into the salon, hoping to get some concrete answer on my silhouette and color preference. Most importantly, I needed some insights into dress construction.
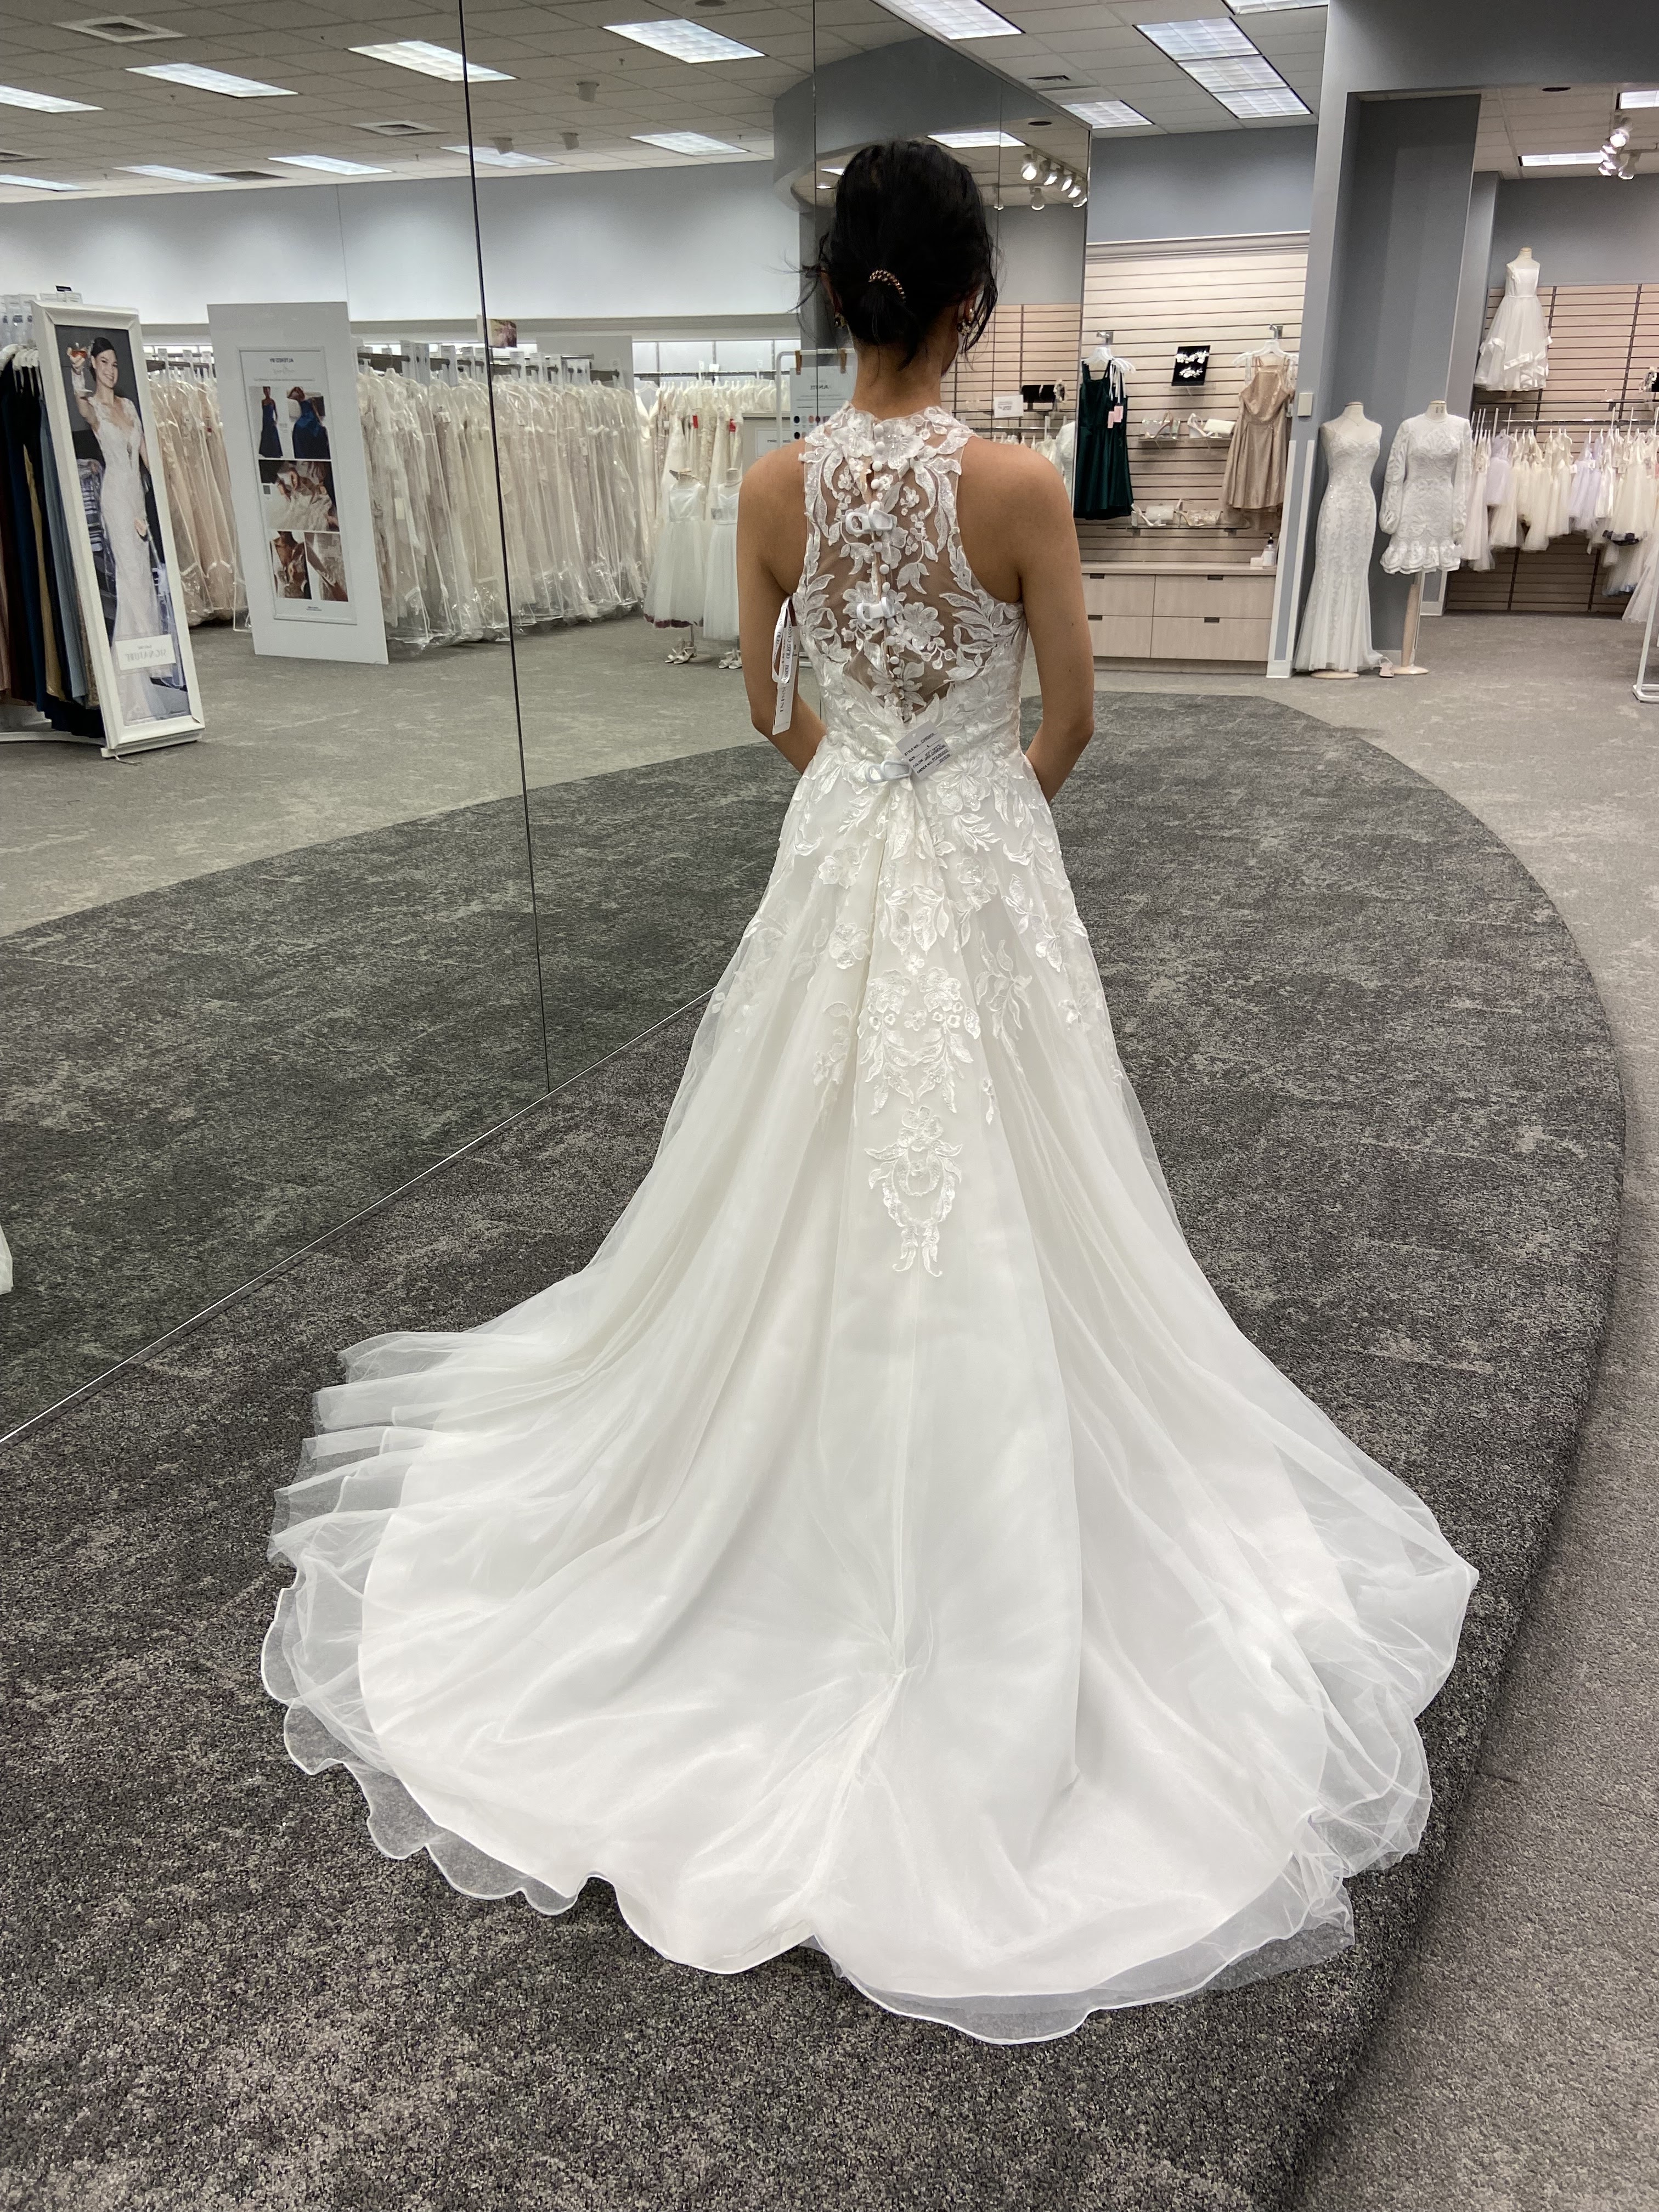
I would strongly recommend visiting a bridal salon before designing your dress, because I definitely had no idea how many fabric layers I may need (4-5 in case you were wondering). I took some pictures of features that I liked, or want to mimic as well. I found layers of foundation tulle/netting to give the dress body, as well as lining layer to keep the dress nice to wear. Style-wise, I didn't think I would love the mermaid look THAT much. But I walked away from the visit realizing I like the mermaid silhouette best and prefer a mauve/pink/blush color dress over white or ivory. My bridal consultant was also very, very good at her job and pointed out that I preferred viney bits of delicate lace over the giant flowers (this will come to help me make lace decision later). It was also at this appointment that I realized I wanted a sparkly dress.
Here are the top 2 wedding dress choices at the bridal salon. The top one is a halter cut A line dress, and the bottom is a mermaid dress.

Fabric Store Visit
Next up, I wanted to feel several fabric choices before designing. As we sewists know, fabric can make or break a design. I actually visited several fabric shops while on my trip to Japan and Hong Kong in hopes for beautiful bridal fabrics, but no luck. Locally, my nearest fabric store is Joann, so I went there and played around with their poly satin, layering it with different types of tulle and laces. I left the store confirming that I want a base layer of color that is purple or lavender hue with an overlay of tulle or mesh that is glittery, and some lace on top for extra decoration.
 |
| Testing at Joann: Beaded lace and sparkly tulle overlaid on different color poly satin |
Time to Design
Throughout this whole time, I find myself asking: What *is* "bridal"? This was an essential question to answer as I tried on wedding dresses, studied countless wedding dresses pictures, and compared bridal gowns to regular white dresses. In my opinion, features that screams bridal were the fitted bodice, intricate lace designs, and floaty skirts. These became the foundation of my dress design.
Other features that were important to me, i.e. design goals
1. Mandarin Collar.
Besides what I've identified so far (i.e. color, layering, silhouette and style lines), I wanted to include a mandarin collar to echo the look of a cheongsam or kwan qua - THE traditional Chinese wedding dress. This nod to my heritage was really important to me. Even though I don't envision myself in a traditional red kwan qua on my wedding day, I wanted this aspect of my Asian culture to be represented as I forge my Asian American culture.
2. Re-wearable.
Something else that's important to me is sustainability: I don't necessarily want to put in a lot of effort and money into a dress that I can only wear once. I explored options on making the dress reusable and decided that I could make the top and skirt separately and increase the probability of re-wearing the top. The fabric choice is where it got tricky for me because traditional wedding dresses tend to be made with silk, but I do not wear silk at all.
It is not something that I currently have in my wardrobe nor is it
something that I want to attempt integrating into my wardrobe at the moment. So the fabric choice needs to be something that will go with my current wardrobe. Another concern was that the bridal aspect of the outfit might make it less re-wearable. Luckily, my friend Shilyn (@shilynsews) suggested to create an overlay garment for the dress to make it look "bridal". I've had some very lovely brainstorming conversations with my IRL and internet sewing friends, and I am so grateful for all the conversations to get my creative juices flowing.
3. Design vibes.
After many Pinterest and Instagram scrolling, I've come up with a few words that described the overall feel of the dress I really hoped for - ethereal/floaty, elegant, and subtle.
Sketching the Design
A big part of this design journey is balancing rewearability/integration into everyday wardrobe and the traditional look of a
wedding dress (ex. fitted bodice, train). I've sketched several designs until I landed on this one here. The dress features a top and skirt set with lace and tulle on top of a base light purple layer. It's a fitted halter neck top with mandarin collar, featuring princess seams and flows into a gorgeous fitted mermaid skirt. The tulle adds that extra ethereal-ness. I wasn't sure at this point how the back would look, but the design is slowly emerging and I was so thrilled for this journey. The top and skirt set also gives me the flexibility to integrate into my existing wardrobe. And I always have the option to hem the skirt shorter for everyday wear.
 |
| Initial Design Sketch |
Finalizing the Design
Fabric was a major conundrum for me. I was deciding between linen and silk shantung. Both are relatively stable and easy to sew for my growing-in-complexity project. Both are much less shiny than silk charmeuse and would integrate better into my existing wardrobe. Working off of Shilyn's suggestion and after a conversation with my friend, I decided to complicate my life and make an overlay dress on top of the existing top/skirt set. That way, I can wear the base together or separately for maximum usage.
Adding the Cherry on Top
A few weeks after deciding to create an overlay dress, I had a conversation with my friend Koss (@withorwithoutice) about my worry of looking too costume-y by having a cape as part of my wedding dress look. They said, if there's a day you can look costume-y, it's your wedding day! Obviously, that means, the cape is now part of the design. And that is how I went from a single wedding dress design to making a 4-piece ensemble wedding outfit.
Comments
Post a Comment