Wedding Sewing 6: All about the Top
Welcome back to another blog post! This one is dedicated to the top. We’ll go over the several mockups I fitted, making a corselette, and finally the moment where I felt butterflies about my design.
Mockup from my first drape ever!
My first draped garment actually fitted well. There were a few spots to take in, specifically around the princess bust seams, but I was so proud of myself! I also attempted to refine the halter armhole lines by drawing over my fit pictures, but decided that I prefer having more coverage around the front of my neck, which means I need the shoulder seam. Once I decided to make the top and skirt set, I realized I had to extend the top hem so that I can wear it with regular bottoms and not show my midriff. |
| Mock up #1 fitted! |
The Missing piece: the back arch
I was unsure how I wanted the back to look. Clearly, I will need something to connect with the shoulder seam. After some more browsing, I find myself gravitating towards exposed back or intricate back designs. Several sketches later, I decided to try an arch shape. I draped it on the dress form again and cross checked the pattern against my bodice sloper, before finalizing the pattern. It was time to make a mock up. |
| Look at this beautiful back arch |
The first time I tried the mock up on , I made an audible gasp, and felt butterflies in my stomach. I’ve always thought the overwhelming emotional feeling that I see on “Say Yes to the Dress” was for dramatic reality TV purposes. But here I was experiencing this very same feeling that affirmed this was the missing piece to complete my dress! I refined the design by moving the back strap endpoints from the side back panel to where the center back and side back panel meets, and changed the width of the strap to better complement the proportions.
Corselette
Like I mentioned before, I got too excited making the dress pattern when I should have started with the foundation corselette. I found this very detailed post series on the Sewing Pattern Review Forum and attempted at making my own strapless corselette. I won’t go into full details as the forum posts do a great job of explaining each step and providing a starting pattern. However, knowing I’ll have to fit the mock up to my body anyway, I made a copy of my top and manipulated it into pattern pieces that resembled a strapless corset and went from there. I really liked that I could dictate where the strapless cuts across my body with this method. Here is my fitted sample corselette, and I’m so pleased with it! I’ll definitely be making a strapless dress now that I have a pattern for this foundation.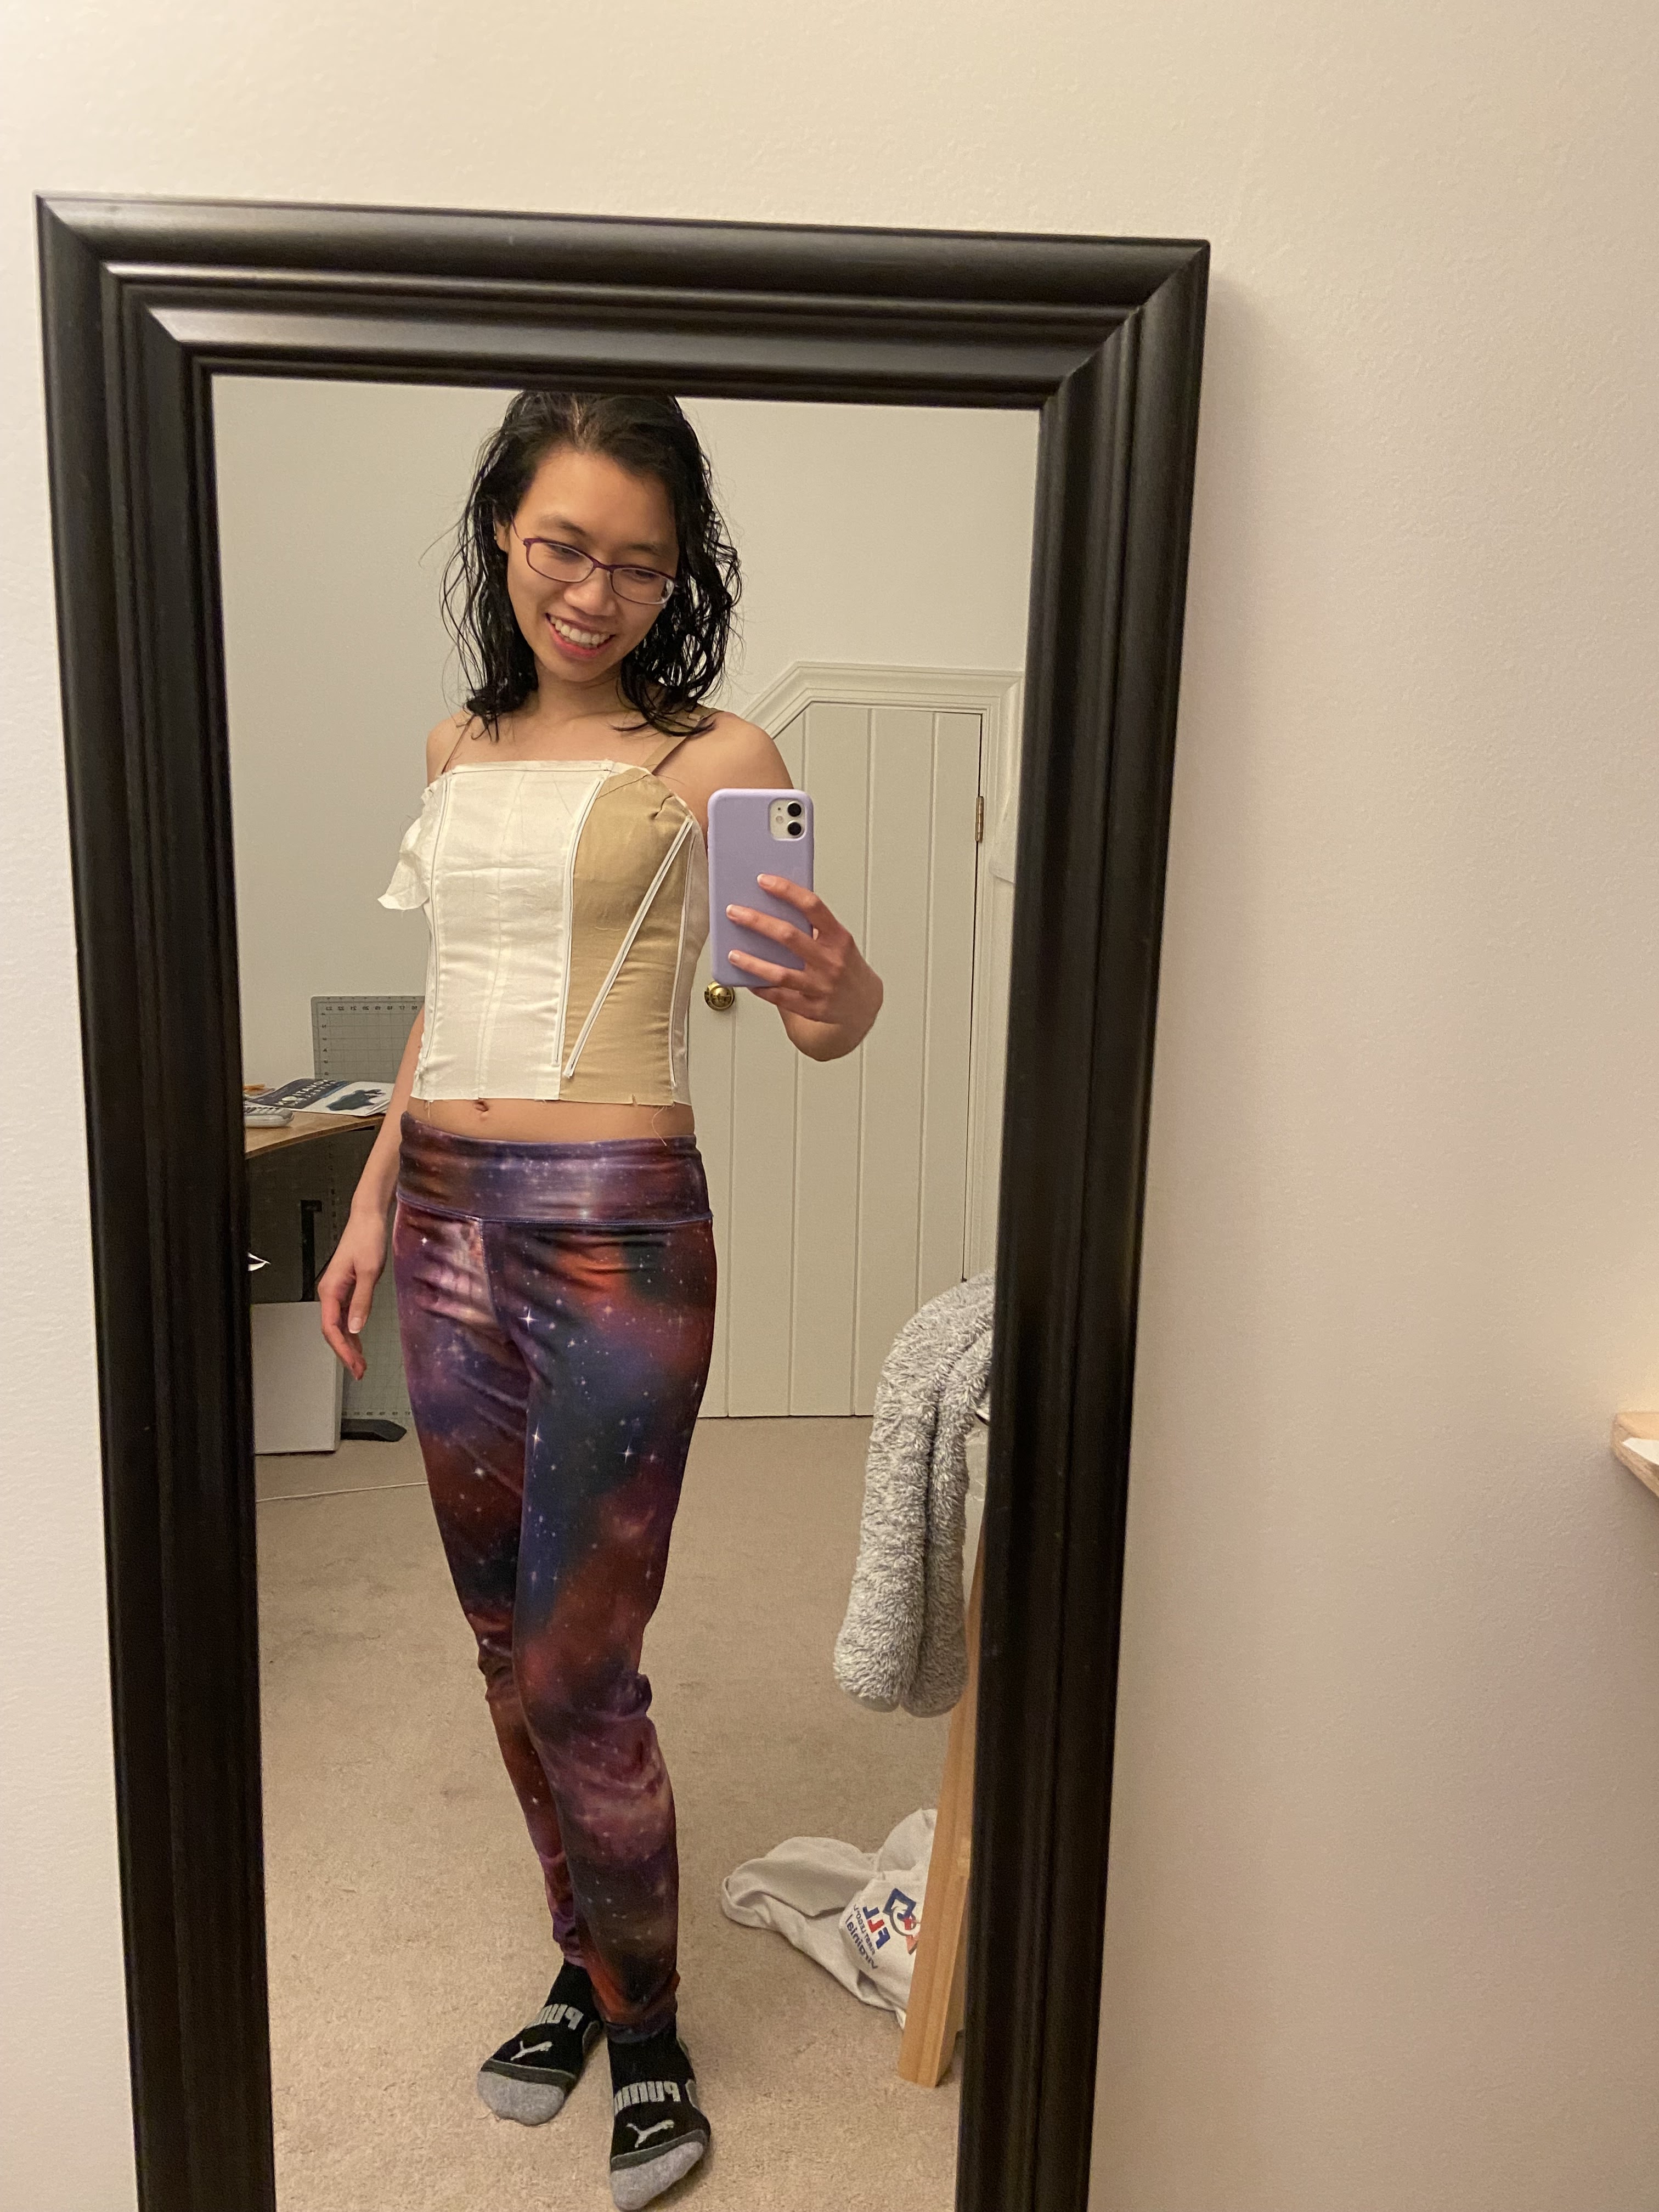 |
| Fitting the corselette |
However, because my dress isn’t technically a strapless dress, I had to come up with a way to integrate it with the outer shell. I decided that I would add a facing to connect the strapless corselette with the top outer shell. See diagram below. The tricky part here is drafting the facing. In retrospect, I should have draped it directly on my body. Because I made this foundation piece at the end, my top shell was no longer fitting correctly and I had to re-fit the mockup again.
 |
| Sketch for attaching corselette to top via facing |
Making the final top, starting with the corselette
It took some courage to cut into the real fabric, but I did it! I began by making the corselette. The cotton broadcloth was very strong and stable, and I would recommend using it. It also took all my pencil markings well, which was really helpful because I was working with patterns without seam allowances and had to add my own while marking the fabric cut lines. I added some boning channels by making bias strips from the broadcloth. |
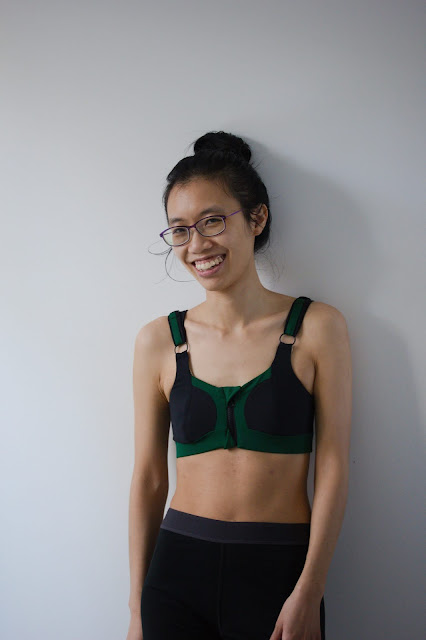
| Front view of the corselette |
 | |||
| Inside view of the corselette with premade bra cups |
 |
| Corselette final try on |
Because I have an ultra small bust, I decided I need to add some shaping to my bust. I experimented with cutting out an old bra cup for the corselette, but ultimately decided to add some bra pads on top of the bra cups that came with the forum instructions. The reason is that the drafted bra cups was molded to my body and therefore fit much better than the bra cup from an existing bra. I found this tutorial from Beverly Johnson that teaches how to make a bra cup using the russian doll method to even out different size breast tissues for a bra. I also used another YouTube video that teaches how to make the crescent shaped bra pads. Combining the two methods, I was able to add layers and pads until I was happy with my bust shape. This was a huge lesson for me in terms of body positivity: I can shape my body in a way that works for the garment shape or silhouette without feeling guilty or shameful about it.
 |
| Stuffing the moon pads with scraps cut-and-sew foam |
 |
| Moon pads |
For boning, I bought both the spiral steel boning, clear plastic boning, and rigilene. I was not impressed with the clear plastic boning as it felt very bendy. Rigilene was similar, but perhaps I had added a lot more boning due to the foundation instructions, I felt more secure. I have yet to experiment with spiral steel boning, so I cannot comment on that.
Making the top shell and lining
Setting the corselette aside, I began cutting and assembling the top and lining pieces separately. I patiently hand basted the underlining to the linen fabric, but I lost steam at the end and relied on my trusty sewing machine to finish the job. Hand-basting is definitely more carefully accurate as the sewing machine may shift the fabric layers due to the feed dogs. But you do you!
 |
| Basting the pieces together |
Because this is a unique creation, I had to come up with my own sewing instructions as well. It was clumsy at times because I wasn’t sure which steps should go before which one - this is where more sewing experience really helps. I’m sure I could have figured out the best way to sew this garment together, but this was all a new journey and a one of a kind make.
The back came together fairly easily as well! Once I decided on the back arch shape and where it will end, I added an elastic along the arch opening to ensure that it would lay flat on my back instead of gaping and prevented stretching the fabric on the bias excessively.
 |
| Back strap mid-construction |
Another tricky challenge was to get the collar and back to close tightly. I toyed with the idea of using snaps, but decided that hooks and eyes might be better as I'll need to add another piece of fabric to hold the other side of the snap. Sewing the hooks and eyes in the correct place took me many tries. I also thought about adding a shield to protect my skin from the hooks and eyes that’s holding it together. But after examining an existing dress that has a similar back neck closure, I decided the shield was not necessary.
 |
| This was as close as I could get the back to close up |
 |
| Fine-tuning the back arch attachment point |
Challenge: Removable boning feature
Another challenge I had was to figure out how to make a washable garment. If I wanted to rewear this top, the boning presents a problem for machine laundering, which is my preferred laundry method. Cindy @cationdesign who does a lot of costuming had mentioned that she makes her historical corsets washable by adding a facing as a flap and leaving it open for easy access to the boning. I followed that advice and conjured up this design where the top shell and lining is barely held together by a few tacks so that I can access the boning channels.
For boning, I bought both the spiral steel boning, clear plastic boning, and rigilene. I was not impressed with the clear plastic boning as it felt very bendy. Rigilene was similar, but perhaps I had added a lot more boning due to the foundation instructions, I felt more secure. I have yet to experiment with spiral steel boning, so I cannot comment on that.

Challenge: separating zipper
The top was almost finished with assembly when I had the realization that the regular invisible zipper I was using would not be suitable. The non-separating zipper would limit my ability to get into the garment. After a few moments of panic, I went on the internet to find something called a separating invisible zipper. It was very cool, and thank god it is in stock! A few days later, my zipper arrived in the mail and the world was right again. Crisis averted. 
 | ||
| Installed separating invisible zipper so I can get in and out of the garment | Inside view of the separating invisible zipper |

What I would have done differently
A major mistake I made was not Interfacing the collar! I’m still kicking myself and dragging my feet to mend it. In the future, I would like to add a mechanism to connect the top and skirt when worn together. As I sit down, the back of the top pokes out and my current solution is safety pins. It’s a good solution until I see them poking out. As I wore the top, I noticed the boning also dug into me around the waist. I think it might be smart to consider cutting the boning shorter. However, that would make it difficult to retrieve the boning from the boning channels. I will admit I definitely over complicated this boning channel situation had I went with dry-clean only to treat my garment.
This top was riled with difficulties mostly because yours truly over complicated the heck out of it. Other tricky parts of the sew was how to clean finish everything with the facing and lining, but also understitching everything. I may also have inadvertently stretched the armhole while understitching because I was too lazy to staystitch my armhole opening. I swear I will never skip that ever again! *cries* That said, this is the end of the top construction! Catch you all on the next one where we talk about the skirt.
Comments
Post a Comment